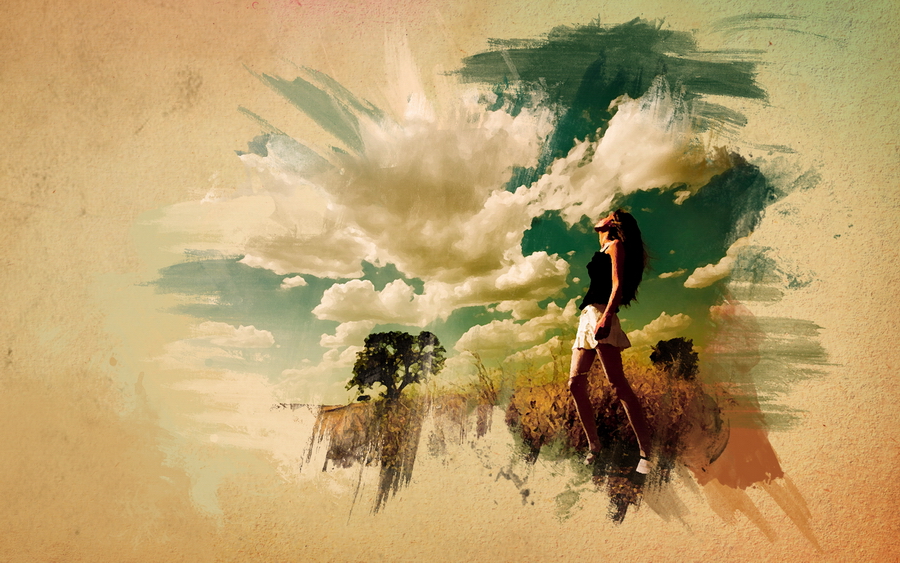
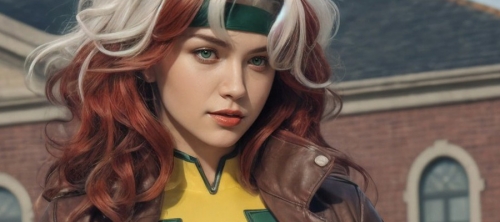
Watercolor is one of those effects that can be difficult to replicate digitally, but with a little practice and experimentation I think you’ll find it can be rather fun.

This tutorial will be based around creating a really cool watercolor effect, but this technique works just as well when creating paintings in Photoshop.

TUTORIAL DETAILS

  • Program: Adobe Photoshop
  • Difficulty: Beginner
  • Estimated Completion Time: 40 Minutes

Step 1

The first step here is actually the first step in all my projects. I look for references images based on a sketch that i have in mind. This research and planning process is intertwined. It allows me to look through various elements and plan the direction to follow. Of course, I can change the direction during the creation as this process is fluid.

Step 2

Create a new document in Photoshop, I used a wallpaper size of 1920 pixels by 1200 pixels.

Download this old paper texture pack, and place the Paper 2.jpg in your document.

paper-texture-free-download

Step 3

Now let's use some brushes, in this case the fantastic Bitbox set of watercolor brushes. Go ahead and download these watercolor brushes. Bitbox has some other amazing watercolor brushes as well, so feel free to test different ones as well.

Create a new layer and select the Brush Tool (B) and blue for the color. Create a new layer, then with just one click paint place some paint on the layer. Select a different brush and use red for the color. Also you can try different Blend Modes, in this case I used Normal but you can try Multiply as well. Repeat this steps with different colors until you achieve something similar like int the picture below.

paper-texture-download

Step 4

Group all the layers with watercolor brushes and duplicate the group. You can hide one. With the other layer go to Layer > Merge Group. Rescale the layer and make it bigger, as in the image below. Then go to Filter > Blur > Gaussian Blur, and use 250 for the value. Now change the Blend Mode to Multiply.

watercolor-blur

Step 5

Select the Eraser Tool, then select a big round brush and erase some areas from that layer, mainly in the center.

watercolor-background

Step 6

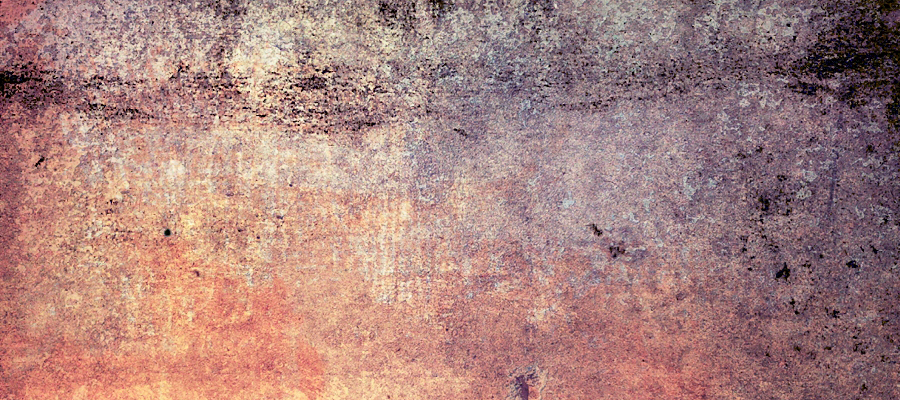
Now let's add a nice texture on top of this layers. You can use the image of your choice, it could be parchment paper for example. I'm using the image below:

wallpaper-texture-old-paper

Place the image in the document on top of the other layers. After that, change the Opacity to 70% and the Blend Mode to Darken (you can try different Blend Modes).

Step 7

Now let's place an image in our document. I'm using a photo of a girl in a field from deviantART, you can get it here.

Select the image and go to Filter>Artistic>Dry Brush. Use 0 for the Brush Size, 9 for the Brush Detail and 1 for the Texture.

girl-dry-brush

Step 8

Select the image layer, after that go to Layer>Group Layer. The layer of the image will be inside a folder in the Layer Palette. Select the folder and go to Layer>Layer Mask>Hide all.

girl-in-the-field-with-backgr

Step 9

So now, let's use some Watercolor Brushes. The ones I use are from Brusheezy and you can download them here http://www.brusheezy.com.

So select one of the watercolor brushes and them white for the color and paint on the layer mask of the group. You will notice that the image will start showing.

first-paint

Keep painting untill you can see the image without losing the brush splatters.

painted-girl

Step 10

Now add another layer, this time beneath the Folder that the image is in. Then again using the watercolor brushes paint over the layer using familiar colors of the picture. Use the images below for reference.

girl-with-backgr-painted-explained

girl-with-backgr-painted

Step 11

Let's just adjust the color of the image. Select the image and go to Image>Adjustment>Photo Filter. Select Warning Filter (85) and 20% for the Density. Also select the Preserve Luminosity option.

watercolor-effect-in-photoshop

Conclusion

The idea of this tutorial is to show how to create a design from multiple reference images, a simple sketch, and your own ingenuity. Just place your logo and that it you will have a really cool effect and super simple to achieve. That can be used for website headers to create a simply awesome design, and, of course to create posters.

Comments

  • Nate
    Looks great. Thanks for sharing this technique. I love this watercolor-style.
  • Veminds
    Simple awesome. One of the best tuts I’ve ever seen :)
  • Bobby
    you do good things. very creative, good use of resources. Thanks!
  • Michael Plant
    great tutorial on a pretty hot style. thanks for posting – lovely work as always.
  • Nancy
    way too awesome! Can’t believe it.
  • Danielle
    Thank you so much. Really helpful and really beautiful.
  • Arnaud Alves
    Excellent tutorial. I had a blast doing the whole thing. Taught me a lot about layer masking I didn’t quite understand till this tutorial. Thanks again!
  • Andrew
    Beautiful image. I’ll be trying this one out, it would make a great wall pic too, thanks!
  • Wiliam Waith
    Wow this is amazing and so easy to follow. Thanlk you so much
  • Gorny S. Needa
    Great Tutorial, Love the outcome.
  • T. Arnold
    thanks for the tut its very useful, i’ve been looking for an idea for my new design i’ll use same of this technics!
  • Sarah
    Really nice! Thank you very much!
  • Timothy
    I really like that, it seems so easy, sometimes you forget the simple stuff.
  • Daniel
    Awesome tutorial! Just finished it in not more than 20 minutes. The outcome is great. :D Extremely simple and sweet effect. Thanks! :)
  • Saad Kamal
    Long time reader, first time commenter.Very interesting and creative style! I check for updates everyday. This would be one of my favourite tutes from you guys so far!
  • Heatherina
    simple and yet effective, this tutorial would look good for creating logos. This is worth a try!
  • Theodore
    Love simple techniques that look this good, very useful.
  • Gareth
    Would be a great effect for animation, doing a few frames like this and then blending them from one to the other would look fantastic.
  • Quileutte
    I love it... very useful tutorial... thank you for sharing....
  • Fazi
    It seems rather oil or akrylic not watercolor but it looks good!:)
  • Shamima Sultana
    very nice..wonderful
  • Luis
    Nice!
  • Stuart
    Great tutorial. Some really useful tips on design.
  • web Design Maidstone
    Wow this is really amazing, so much simpler with the tutorial with great results. Thank you!!
  • Kanpur
    very very nice water color.
  • goldy
    brilliant use of colours & effects ossum..........
  • bremen
    really really great collection of creative stuff. good work great job! stay creative and greetings from bremen
  • YK
    That you so much for the information on this website! I used the HDR tutorial and loved the finished product. You made it easy to do for a beginer at CS5.
  • khaing nyein thu
    Thank u so much for this tutorials..it is very useful and i get a lot of knowledge ....
  • Alex
    muy buen tutorial! gracias es muy creativo thanks it´s awesome tutorial
  • xielifang
    very good tutorial,thanks for sharing
  • Childmonster
    Very nice tut
  • nawarezaika
    awesome..i will make it now.. thanks
  • Faruk
    Looks great.
  • Web dizajn Crna Gora
    Looks fantastic, thank you
  • TRSteep
    nice effect! not necessarily download brushes, because in CS 5 there are imitation of brushes
  • Leonardo
    You ROCK!!!
  • Leonardo
    I love your logo and I want to eat that !!!!
  • Jerry Lafferty
    Thats a pretty cool looking effect. Thanks for the cool tut!
  • shan
    Very nice stuffs.the design are awesome.Thanks for the tutorial.
  • Jess
    This tutorial was EXTREMELY hard to follow. It was a great technique, but your explanation was atrocious. Please word your tutorials much clearer in the future, and be much more specific when it comes to layers and such. It was really frustrating to do this tutorial because I really wanted to learn, but...you made it way too difficult to understand most of the time, and I had to go by trial and error. Thanks.
  • ain
    can i know does there a photoshop download for free? if you got, please give me the download link thanks.
  • chriz
    dude ur awesome
  • Crna Gora
    I really like this, thanks a lot
  • Leeboteddybearlovegod
    nice tut, but if you want to mess with the most realistic digital watercolour effect the crown goes to Artrage, its just on a level all of its own.
  • Benny Qibal Channel
    Realy great and easy to follow. I will do that soon. Thanks for beautiful watercolor effect!