In this tutorial i will show you how easy is to create a background with veritcal lines. This type of background was used lately a lot because it is the latest trend in design. For start i will show you the result of my tutorial after i will explain how i made it.

Let’s start our tutorial by creating a new document with the following size : 500 x 500 pixels.I will set my Foreground color to #000000, then with Paint Bucket Tool i will press one time over my document.
Create a new layer and select it (shift+ ctrl + n).
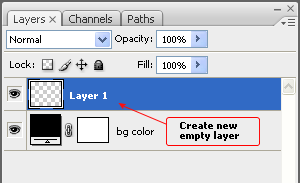
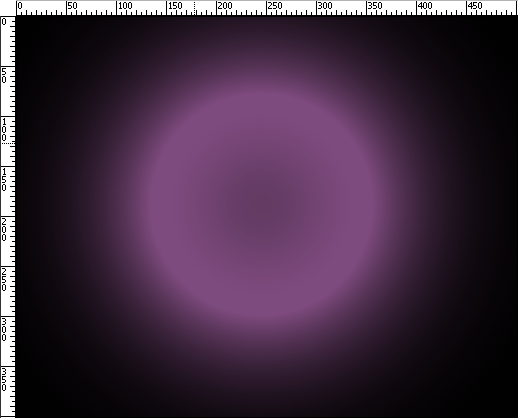
Grab Brush Tool, and with a Smooth Round brush, create 1 point over my layout with the color #a864a8

Please note the brush size should be 400 pixels.
![]()
This is the result you will need to have
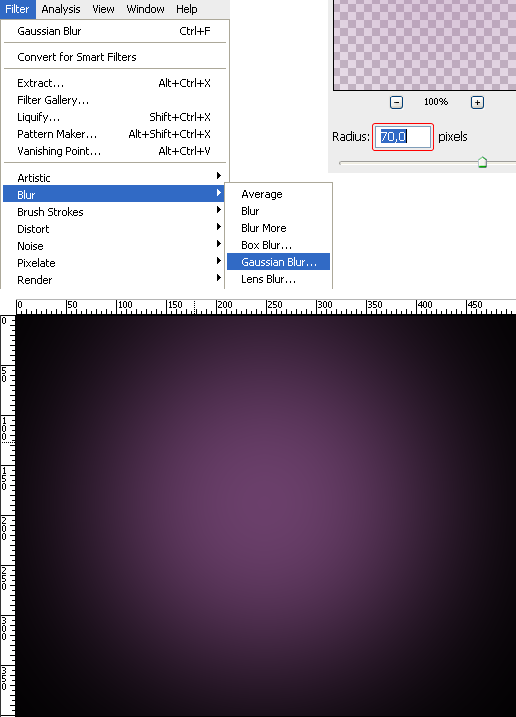
After that, we need to blur the image. So you need to do this: Go to Filter > Blur > Gaussian Blur, set Radius at 70 pixels. Here is a picture with how you can do it and how should it look:
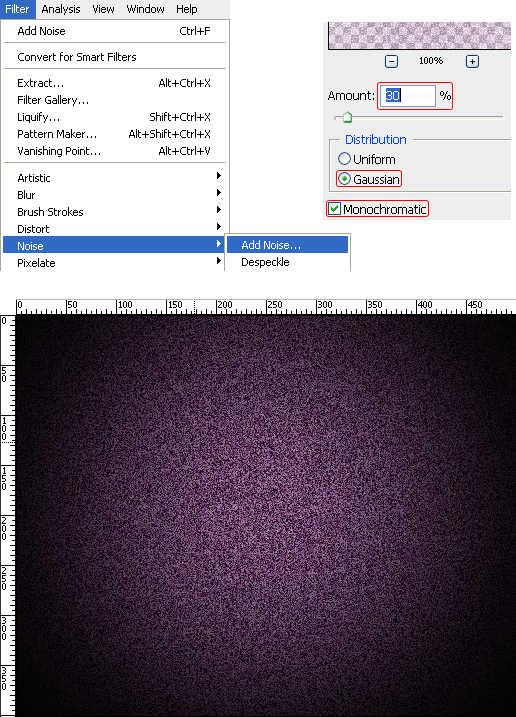
Now go to Filter > Noise > Add noise. In amount field change the value at 30%, distribution should be Gaussian and check the Monochromatic box. See the example below:
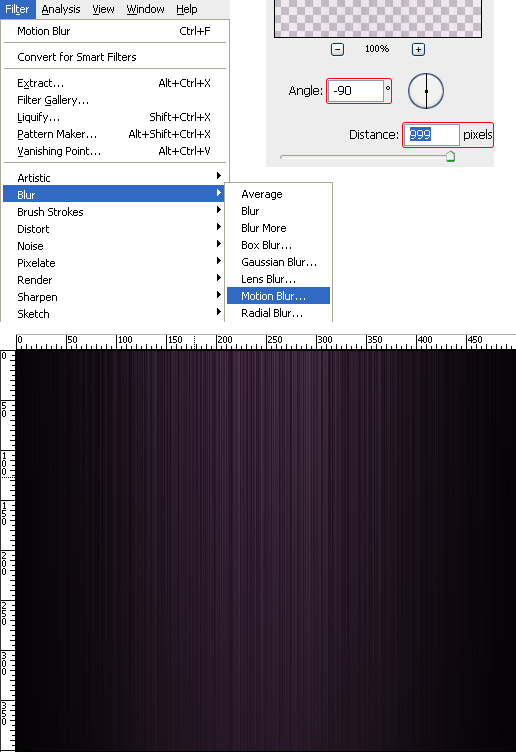
Now go to Filter > Blur > Motion Blur. In the Motion blur window, set the angle to 90 degrees, and distance to 999 pixels. See the example below:
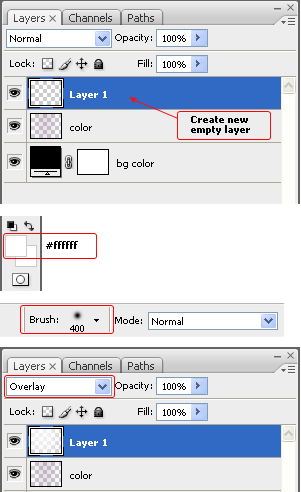
Hmm, few more tweaks and should look fine and ready for any use. Now you need to light up a bit the layer, how we do that? Well is easy, Create a new layer above the existing layer we have already, then select that layer and modify the blending mode of that layer to Overlay, then select brush tool, and now add a white point on the layer we have created. See the example below with the steps you need to fallow:
Well that's it, here is the final result:

Conclusion:
This tutorials can be applied in any situation, when you have to design a background or a banner, flayer etc... I love vertical lines because they are very simple and nice looking. Hope this tutorial helps, and also don't forget to Be Creative!
